30 April 2014

30-Apr-2014

The Song That I Loved At First Hearing


New Bulgarian rock music sounds like this. And it's amazing, I get goosebumps every time I listen to B.T.R., I grew up listening to their music, night and day. I remember that my the first time I had the opportunity to listen to them live I started crying. Never mind, hope everyone is having a great day so far!


You can't get lost if you don't know where you're going...

29 April 2014

29-Apr-2014

My Toothsome 3-Meat and Cream Puff Pie


The only thing I like more than a good old-fashioned fruit pie is an innovative and interesting savoury pie. Yes, that's right, savoury pie. I know, it's not the first thing that comes to mind when someone mentions pie but believe me - you should try a savoury pie at least once in your lifetime. Over the course of 1 year or so, I have baked more non-sweet pies than sweet ones. Damn, since last Summer I have only made my American pumpkin pie twice, both for Halloween celebrations, and this is it. On the other hand, savory pies have been part of our meals almost at least once a month. What is a girl supposed to do when her imagination runs wild and her partner loves to eat?! Cook, cook and cook, and try to come up with new recipes on the move.
This pie in particular can be justly called also leftovers pie. Half of the ingredients are the leftovers from my last week's roasted chicken and creamy sauce, the other half are leftovers from my fridge. Faced with the options of either trowing everything away when it goes bad few days from now or putting everything in a new huge meal on its own, I wisely chose the second one. This is how this pie was born.
I use store-bought puff pastry for two reasons. A - saves me money because the whole pack of puff pastry coasts as much as I'll have to invest in the butter solely to prepare the same amount and quality of pastry. B - saves me time, because preparing puff pastry hell of a lot of work, it's one of the most time consuming things ever. Oh, and the store-bought pastry is actually good, I always keep at least a back or two in my freezer, for just in case. Now, to the recipe itself.

Ingredients:


  • 1 Pack Puff Pastry
  • 100gr Each: Cooked Chicken, Bacon and Ham
  • 150gr Frozen Peas
  • 150ml Single Cream
  • 100gr Creamy Sauce (recipe here)
  • 1/2 Ball of Mozzarella
  • 1tbsp Grated Parmesan Cheese
  • Flour for Dusting
  • Splash of oil
  • Plus: Baking Beans

How-To:


  1. Start by dusting with flour a clean surface.
  2. Place your puff pastry on top of the flour. Cut a 1/4 of the pastry and set aside. This is the top of your pie.
  3. Roll the rest of the pastry so that can cover the bottom and the sides of your pie dish.
  4. Line the pie dish with baking parchment and put the pastry on top of it.
  5. Put another sheet of parchment on top of the pastry and arrange your baking beans on top of it.
  6. Put in the oven and bake with the beans for 10 minutes and then another 5 without the beans or the second parchment. Bake at 150C.
  7. In the meantime in a sauce pan put the meats, the creams and the peas. 
  8. Bring to boil and then let simmer for few minutes.
  9. When the mixture seems thickened up take of the hob and stir in the cheeses.
  10. By this time the base for the pie should be ready and out of the oven.
  11. Pour the meat-and-cream on top of the pie base and set aside.
  12. Roll the remaining 1/4 pastry into a pie top.
  13. Put on top of your pie and with a sharp knife make a small X in the middle of the pie - this will allow to the steam to leave the inside.
  14. Brush a splash of oil on top of the pie to make it extra crispy.
  15. Put the pie back in the oven for 15-20 minutes at 150C, until its golden and crispy on top.
  16. Serve with white wine and good company.


You can't get lost if you don't know where you're going...

28 April 2014

28-Apr-2014

Going To The Movies: Noah


Ever since it hit the cinemas few weeks ago, Darren Aronofsky's Noah have received anything but praise. Superlatives about the movie were raining from everywhere and I was excited to see for myself this acclaimed masterpiece. I was even more enthusiastic to watch Emma Watson in movie that everyone said is her best so far. Vanity Fair's website even had a story about a month ago how her Ila is an Oscar-worthy performance. It's fair to say that I had high expectations.
Unfortunately for nothing. The story goes slowly, and somehow painfully. It's epic, that's granted, but not in the right way. I didn't feel fearful of the great storm or any bit moved by the supposed great dramatic moment. Jennifer Connolly's performance was bland and her expressions somewhat dull, her tears failed to move me. And although Emma Watson's overall performance to be not bad at all, her young mother scenes were mediocre in best case. All the tears in the world couldn't create something that is just not there - Emma to experience on screen something she have no clue about in real life - being mother. Her emotions seemed more like the ones of big sister rather that loving caring mother.
Oh, and not to mention Logan Letterman and Douglas Booth - neither of them looked as having any clue what they are doing and how should they act. Painful to watch. The children who played their younger selves did much better job, maybe because they weren't so concerned with their looks and they actually concentrated on the acting part of being actor.
However, Russell Crowe did an excellent job in making me hate him in the guts for being so prime-deterministic. Yes, I am atheist so maybe I can't relate to the struggles of a man who receives faxes from God, but this Noah seemed as an asshole, if you ask me. Or just crazy man, the choice is yours. Also, I must admit than besides the motherhood scenes Emma Watson was actually really good, pleasant to the eye and all. She did good job portraying someone who struggles between what they think is right and what their heart wants. Good performance, overall, for the young Miss Watson.
One thing that I see as a huge plus for the movie is their rather evolutionary side. Or more like "not-creationist evolutionary" side, if that makes any sense. Although is a Bible movie the G-word was never mentioned. Nor huge hand from the sky was shown to guide the building of the ark. It was as ungodly as such movie can be. And that was definitely a good thing for the long run. Oh, yes, and the movie ends with a huge rainbow on the screen, which reminds to the gay pride flag too much not to be on purpose. Thumbs up for all of this.

Noah is not for all tastes and is not a movie I would recommend but if your up for huge waves and signs from above, maybe you'll appreciate this movie more than I did.

Grade: 4/10


You can't get lost if you don't know where you're going...

27 April 2014

27-Apr-2014

Mouth-Watering Bacon and Tomato Frittata


When if not on Sunday morning should one prepare a special, indulgent breakfast? Especially if you happen to have breakfast at 11:30 in the morning, like we did this morning. Ah, the joy of waking-up late and then eating a succulent breakfast with you loved one and a cup of nice hot coffee. If this is to be alive, I like it very much!
Now, about the frittata. There are plenty of options what exactly to put in it. You can make it veggetarian, with tomato, mushrooms and onions. Or you can go all-aboard with meat and use bacon (or pancetta), chorizo and ham. Or you can do what we did and mix veggies with meat. There are a very few things that we like more than the combination of bacon, tomatoes and mushrooms. Oh, yes, and nice cheese for topping the whole thing. Mozzarella or Cheddar or any other type that you like, as long as is going to melt nicely. The recipe itself is very easy and simple. It can be also served as light lunch, served with salad at the side.

Ingredients (for 2 big frittatas):


  • 4-5 Slices of Bacon
  • 10-15 Baby Tomatoes
  • 3 Medium Eggs
  • 1/2 Cup of Water
  • Flour, as much as it takes
  • Salt and Pepper
  • 1 Ball of Mozzarella
  • Oil for the pan
  • 3-4 Basil Leaves

How-To:


  1. Heat up some oil in a non-stick pan on the hob.
  2. While the pan is heating-up, slice the bacon and the tomatoes to small pieces.
  3. When the pan is ready put half of the meat and the tomatoes in it.
  4. Cook for 2-3 minutes until tender and almost cooked.
  5. While they are cooking, in a bowl whisk together the eggs, water, spices and as much flour as it takes until the batter is slightly thicker than that for pancakes.
  6. Pour half of the batter on top of the bacon and tomato, cover with lid ad cook at medium heat for 3-4 minutes.
  7. When the bottom is cooked, using spatula flip the frittata so now the bottom is on top.
  8. Put the lid again and cook for 1-2 more minutes.
  9. Put the ready frittata in a plate and slice half of the mozzarella ball over it
  10. Arrange 1-2 leaves of basil in the middle and serve it while is still warm.
  11. Now repeat the same with the other half of the ingredients.


You can't get lost if you don't know where you're going...

26 April 2014

26-Apr-2014

Luscious Milkshake


I have always loved a good milkshake. When I was growing up my Mum and I used to prepare for ourselves nice cold milkshakes every Sunday morning and to enjoy them sitting on our balcony in the mornings.
Probably by now you can spot the trend in here - my Mum is the one to blame for my love for food, she is the one that is never afraid to try something new and is always surprising the family with new recipes. And while she is very much engaged in prepared the healthiest food possible, veggies and fruit all the way, she also knows how to appreciate (and prepare) a luscious, decadent treat. Just like this milkshake.
Let's talk ingredients for a second here. The most important thing in all recipes is if the tastes of the ingredients complement each other. Put simply - do they taste good together. Milkshakes are no exception, especially because of milk, because it's taste is quite recognisible. Again, if you choose to use cow milk the taste so familiar to most people that is almost like its not there but almond milk, soy milk or goat/sheep milk have very strong and rather typical tastes. For this milkshake in particular I would recommend either almond milk or cow milk, because they just mach to the other ingredients. If your food diet requires any other milk, go ahead and give it a try.
New, the other tastes. As a rule of the thumb soft fruits are better for milkshakes than hard ones. And no fruits with pits, please. Also, although pears are rather soft they are not good for mixing with milk, or any other liquid for that matter. I would recommend sticking to bananas, berry fruit, kiwi, and, if you're feeling adventurous, mango and pineapple. Most of them can be used even frozen, and for bananas is even recommended.
Additionally, cocoa powder, nut butters, chocolate spreads, such as Nutella, ice cream, oats, syrups and ice can be added to alter the taste. In the milkshake recipe I'm sharing today a big number of the above is used, so it's extremely luscious and special.

Ingredients (for 2 glasses):


  • 1 Medium Frozen Banana (peeled prior to freezing)
  • 6 Medium Strawberries
  • 1tsp Almond butter (or other nut butter of your choosing)
  • 3tbsp Ice Cream
  • 400ml Cold Milk

How-To:


  1. Chop the banana to small pieces.
  2. Slice the strawberries in halves.
  3. Place all of the ingredients in a chopper/blender.
  4. Pulse together until the mixture is even and fluffy.
  5. Pour in tall glasses and enjoy while it's still cold!
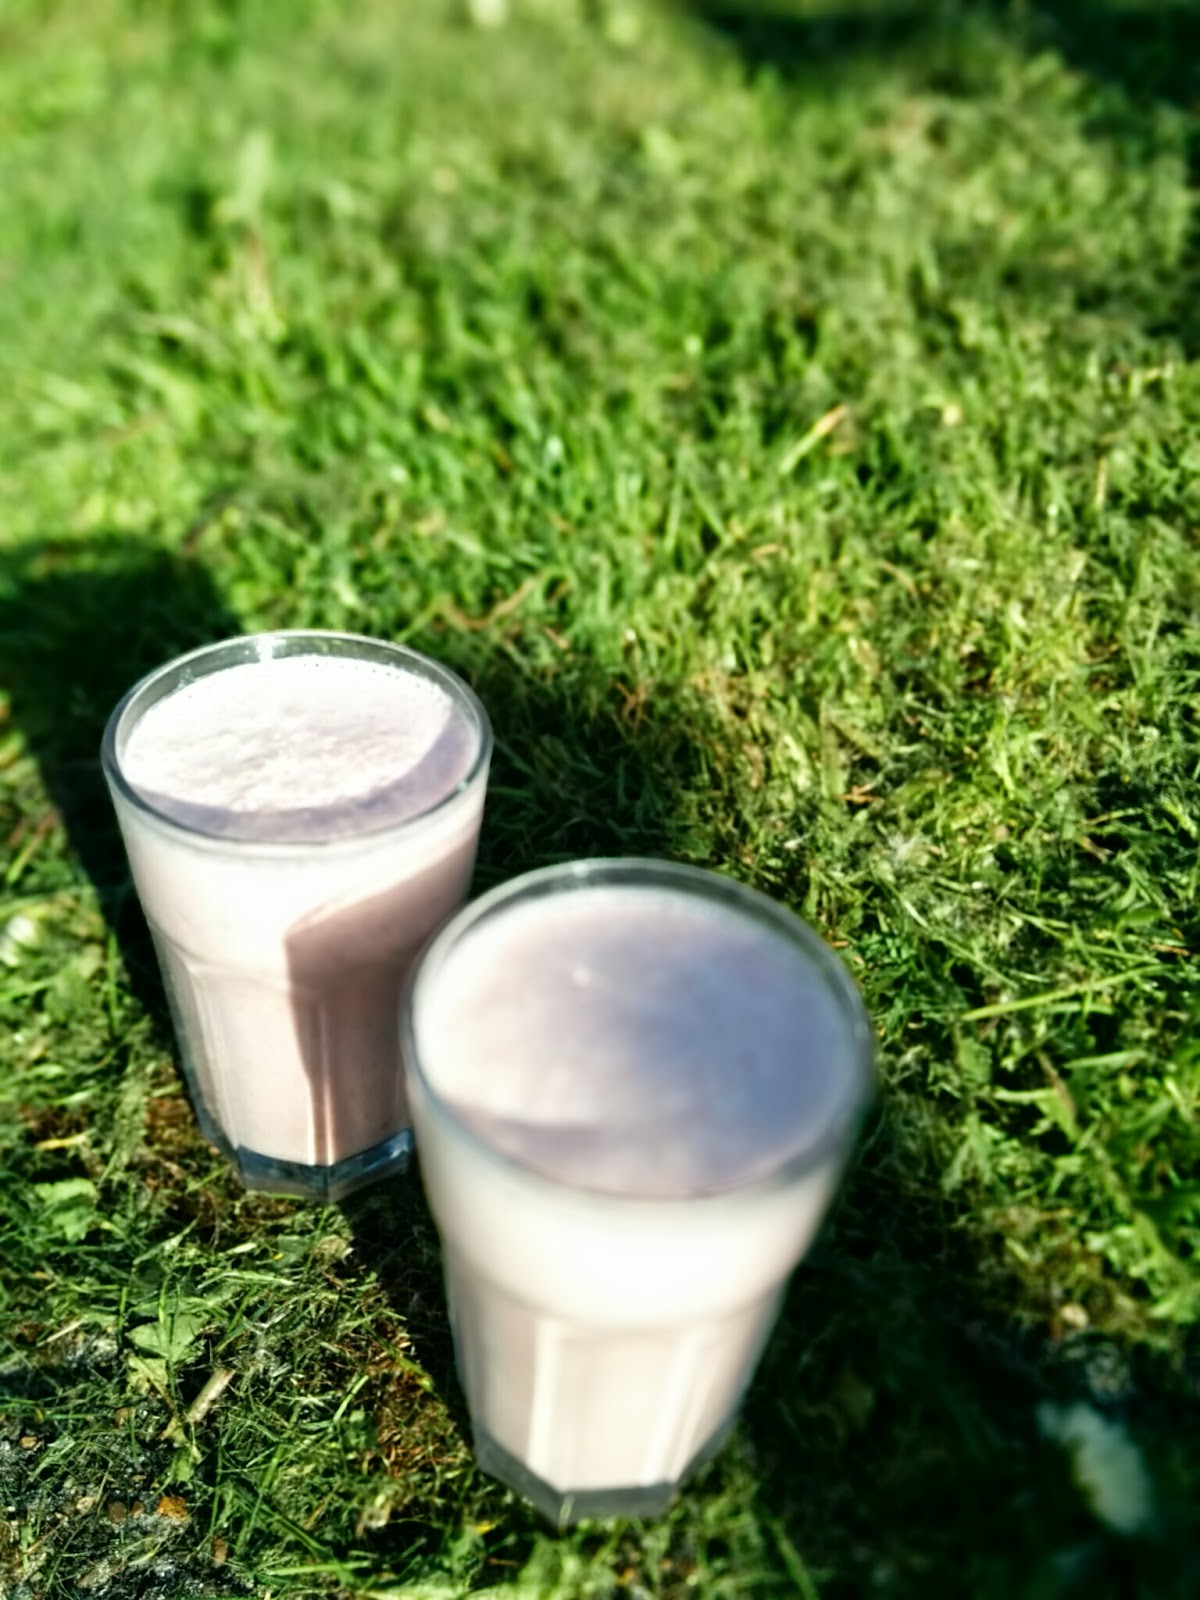
Perfect for Summers in the Garden!


You can't get lost if you don't know where you're going...

25 April 2014

25-Apr-2014

The Secret for Perfect Roasted Potatoes and The Creamiest Creamy Sauce EVER

My cooking post continue. I guess this is one of the pro's of being in Spring/Pre-Exam Break. The other one is having enough time to do whatever sports I want to, not just 30 minutes of yoga before bed. Now that I'm more rested and I have more time for myself, I can indulge Mr.Boyfriend with delicious meals that look spectacular. Just yesterday, I again roasted chicken, the same amazing recipe. I also made time to roast potatoes (the star of this post) and to prepare my special cream sauce. Mmm, I'm hungry again!
So, about the potatoes, there are godly, honestly! I've been trying to make the perfect roasted potatoes for a while but they never turned quite right. Either I will overboil them and when I try to roast them I will roast mash instead. Or I'll under-boil them when put them to roast they will turn into tasteless pieces of crisp. I was about to loose hope and just give up when the mother of a friend of mine came to the rescue. She, just like me moved to England when she was around 20-years-old and didn't know any traditional, typical English dishes. It was fine, until she felt inlove and married an Englishman, who every now and then wanted something text-book English for dinner. This is how, after hundreds of trials, she managed to find the perfect formula for golden roasted potatoes. And, with her permission, I'm paying forward the secret. It's so easy that you won't even believe that this is all. Now, to the kitchen table!

Ingredients:


For the Potatoes:


  • 5-6 Big Potatoes or 15-20 Small Potatoes
  • 2-3tbsp All-Purpose Flour
  • 2tsp Sea Salt
  • 3-4tbsp Grease (Olive Oil, Animal Fat, Sunflower Oil, Butter)
  • Spices of your choosing
  • Water for Boiling

For the Sauce:


  • 1tsp Wholegrain Mustard
  • 1tsp French Mustard
  • 1tbsp Butter
  • 10-ish Small Mushrooms
  • 200ml Single Cream
  • Salt and Pepper


How-To:


The Potatoes:


  1. In a deep baking pan put the grease and place the pan in the oven at 180C.
  2. Peel and cut the big potatoes in big pieces, around 6 pieces form a big potato. If you're using small potatoes leave them whole.
  3. Put the potatoes in a big pot, cover them with water, add a pinch of salt and bring to boil.
  4. Boil them for 3 minutes exactly and then take the pot of the hob.
  5. Drain the hot water using colander.
  6. Still using the colander, shake the potatoes well so that they get roughen around the edges.
  7. Sprinkle with the flour and shake well. Then sprinkle with the sea salt and again shake well.
  8. Take the piping hot pan out of the oven and pour the potatoes in it.
  9. Coat the potatoes well (and carefully!!!) in the hot oil.
  10. Bake for 1 hour, turning them around every 20 minutes or so.


The Sauce:


  1. Heat a non-stick pan.
  2. Put the two types of mustard in it and combine together.
  3. In the meantime slice the mushrooms to small pieces.
  4. Add the mushroom and the butter to the mustard mixture and stir well.
  5. When the butter is melted add the cream and stir together.
  6. Add the spices and bring to boil.
  7. Once it starts to boil, turn down the heat and let simmer for 2-3 minutes.
  8. Turn off the the heat and serve the sauce warm!

Roasted Chicken, Roasted Potatoes, Creamy Sauce, Yummy!


You can't get lost if you don't know where you're going...

24 April 2014

24-Apr-2014

For The Long Ride

Just a few weeks back I used to be some for whom cycling was about getting from Point A to Point B, nothing more. In just few sunny weekends Mr.Boyfriend managed to change that once and for all. This Monday afternoon we did a 37km ride in just above 2 hours. It's not much, but I'm getting there. Unlike last time, when we did mainly road, this time it was more cross-country and some more up hill than I would usually manage to do. I can't wait for this weekend to come so we can go on yet another adventure. I always feel so refreshed after those intensive exercises, like I'm taking control over my own fitness and my own health! Plus, my cheeks kind of liked to be exposed to the nice worm sun for a little while. Definitely a hobby to be continued...


You can't get lost if you don't know where you're going...

23 April 2014

23-Apr-2014

Glorious Victoria Sponge Cake

I have the feeling that I'm slowly turning this blog into a cooking blog. I've admitted (to myself and to everyone else) that I'm a foodie a long time ago but I think is just now that I realise how much of a big part of me is cooking. I love trying new recipes, upgrading old ones, experimenting with the mouthwatering tastes, the delightful aromas, the extravagant combinations. I simply love creating food for the people I love, and as my Granny likes to say - Food brings everyone together.
About today's recipe, is a delicious and decadent cake (what a surprise, right?!). It is one of the most English cakes ever and I thought St. George's day (the patron of England) is the perfect day to share my old-school English layered cake. Well, old-school but with a tine twist. A splash of rum, enough to bring a bit more spicy aroma to the creamy-n-fruity goodness. I was considering adding some sliced almonfs on top of it but decided to try and keep it a bit simpler this time, just for once. Besides the fact now delicious this cake is, it's incredibly easy to prepare, and, on top of all that, it bakes for just 25-30 minutes. Oh, and it's a show-stopper, especially in England where everyone associates this cake with their Nana and the lovely afternoon cake they used to have together. So, to the point:

Ingredients:

For the Cake:


  • 200gr Caster Sugar
  • 200gr Butter, Softened
  • 200gr White Flour
  • 4 Eggs
  • 1tsp Baking Powder
  • 1tsp Rum

For the Syrup:


  • 2tbsp Sugar
  • 1tsp Rum
  • 2tbsp Water

For the Filling:


  • 150ml Double Cream
  • 2-3tbsp Sugar
  • 1tsp Vanilla Extract
  • Strawberry (Raspberry/Blueberry would also work) Jam
  • Icing Sugar for dusting


How-To:


  1. Whisk the softened butter and sugar to a light, fluffy cream.
  2. Add the eggs, one by one, and slowly combine together.
  3. Add the rum and stir well.
  4. Fold in the sifted flour and the baking powder, using slow, smooth movements (a bit like doing 8) so that the airness of the eggs, butter and sugar stays intact.
  5. Grease and line two sandwich tins.
  6. Divide the batter equally between them, making sure that the whole surface of each is covered.
  7. Bake for 25-30 minutes at 180C. TO make sure that the inside is cooked try and puncture the cake with a toothpick. If it's clean after going in-and-out of the cake then its ready.
  8. Set aside and let cool completely before proceeding further.
  9. Now that the cake is cold down, put a small sauce pan on the hob and put all of the ingredients for the syrup and mix together.
  10. Stir it until the sugar is dissolved, then bring to boil and turn off the hob.
  11. Pour the syrup on top of each of the cake and set aside.
  12. In a bowl pour the double cream and (preferably using a electric whisker or mixer) start wiping it. Add the sugar spoon by spoon as the mixture starts to resemble wiped cream. 
  13. Between the 2nd and the 3d spoons add the vanilla extract.
  14. When it light and fluffy stop, you don't won't to over-wipe it as it goes bad.
  15. Place the worse-looking cake on the surface you want to serve it in.
  16. Spread a tick layer of the jam. Make sure that the whole top of the cake is covered.
  17. Now spread the cream on top of the jam, repeating the covering process.
  18. Close the sandwich by putting the second cake on top of the cream and press lightly.
  19. Dust with icing sugar and enjoy in good company!


Mmm, My Favourite Summer  Taste


You can't get lost if you don't know where you're going...

22 April 2014

22-Apr-2014

Lunch For Two

Hummus Bros, London

On Friday Mr.Boyfriend and I spend the whole day in London, running errands and experiencing the present I gave him for our anniversary - a treasure hunt in Soho. After being on the road since 9:30 am around noon we (read Mr.Boyfriend) were starving and we decided to pick something a nice and interesting place to eat in Soho. We usually choose one of the numerous Chinese restaurants every time we happen to be in Soho but this time we weren't feeling so keen on Sweet and Sour Duck. So, while following our Treasure hunt route we came across a fine looking establishment called "Hummus Bros". Now, we are HUGE fan of hummus, the spread of gods, so we didn't hesitate to try this cute looking hummus bar. And our gut did not disappointed us, not even a bit!
Here's how it works: hummus is the base and you get to choose a topping. The toppings range from classical chickpeas (regular portion for 4.70 GBP) to chunky beef (regular portion for 6.50). Also, all mains are served with delicious pita bread, two pieced for a regular portion, one for a small one.
So, this last Mr.Boyfriend and I tried their two most popular toppings - chicken and guacamole (each regular portion for 6.20 GBP) and mmm, it was delicious! The hummus was tasty, fresh, creamy and the spices were just enough, the pita breads were home-made and yummy, and the toppings were just the right amount. We did what we usually do - order the two mains that appeal the most to both of us and then share them so that we can experience more then just one dish. The chicken was slightly spice and really juicy, mouthwatering and the guacamole was a total hit, fresh and zesty! We absolutely loved all of the food we ate, and the staff was really nice, cheerful (but not too much) and polite!
Plus, they make awesome coffee!
I must add, the place don't look fancy and it's aura is more of a canteen than a restaurant. It won't swept anyone of their feet, especially if they are picky on the atmosphere. And if you are just a party of two - you most definitely will share a table with someone else. Which is not a bad thing, but not a very intimate thing either.

Food9/10
Service8/10
Interior: 4/10
Location: 8/10
Pricing: 9/10

Overall Grade8/10

Would we go back there again? - Sure, we loved the food and the prices are just about our budget. Definitely it's a keeper!


You can't get lost if you don't know where you're going...

21 April 2014

21-Apr-2014

Feast On, Roasted Chicken

Homemade Roasted Chicken!
My most favourite part of every celebration is having a bunch of close people to share the day with. Therefore, it should be a no surprise that for Easter Dinner I had a full table of people to feed with delicious meals. Having tremendous amounts of cake left after breakfast and my room-mates birthday, all I had to do was to prepare a main course. So I roasted a zesty chicken. I know, I know, chicken is not the traditional meat for Easter, lamb is, but a truly hate the taste of it. And the smell. And the texture. And how fat it is. I really really really prefer not to see lamb meat anywhere near me. This glorious roasted chicken is inspired by Jamie Oliver's Ministry of Food cook book, but it's slightly modified because this is what I do. I take a recipe I trust enough and then I start to experiment and mostly improvise. The chicken was a blast, everyone loved it and there no leftovers whatsoever, not even enough for a nice chicken sandwich. My guests attacked the chicken before I could've reached for the camere to take pictures of it, so the picture bellow is from Jamie Oliver's site. I plan to do this chicken again very soon, so I'll update the picture once I prepare it again!

Ingredients:


  • 1 Whole Chicken (mine was around 1,35kg)
  • 1 Big Lemon
  • Bunch of Fresh Rosemary, Thyme and Savory
  • Animal Fat of Your Choosing
  • Salt and Paper
  • Paprika and Cumin

How-To:


  1. Wash the chicken with hot water so that you know that is clean.
  2. Put all of the fresh spices inside the chicken.
  3. Prick the lemon all over, using sharp knife. You can even put in the microwave for 20-30 seconds.
  4. Put the lemon in chicken as well.
  5. Season the chicken with all of the spices, ribbing them all over the birds body.
  6. Rib the animal fat all around the chicken.
  7. Place the bird in roasting tin lined with aluminium foil.
  8. Roast for 1 hour 20 minutes in preheated oven at 200C, or until the inside is cooked and the outside is golden and crispy!
  9. Enjoy with fresh salad and roasted vegetables.


You can't get lost if you don't know where you're going...

20 April 2014

20-Apr-2014

Happy Easter, Now Let's Eat Cake!

Surprise, surprise, I made yet another cake. This one was a special present for the 30th Birthday of one of our room-mates. Yesterday was his big day so I decided to surprise him with my favourite cake to make. I love it so much because is so easy but you'll never guess by the looks and the taste of it. Also, there is the great bonus of letting a lot of room for improvisation and imagination, by changing a few small thing you can have different cake every time. And is no bake! How cool is that?! Also, you can prepare it few days in advance and the taste won't change even a notch! Perfect easy cake, done in less than 30 minutes for everyone! Mr. Boyfriend was keeping me company while I was preparing it and his reaction was literally "WOW, that's so easy, even I can do that!". I would love to see him preparing a cake, that will be a show worth filming!!!

Ingredients:


  • 300gr Dark Chocolate (good quality cooking one, like the Dr.Oetker baking chocolate)*
  • 300ml Double Cream
  • 1 Pack of Digestive Biscuits **
  • 1tbsp Butter
  • 2tbsp Honey
  • Pinch of Salt


Additional Ingredients:

Strawberries(or any other fruit that you like with chocolate)
Unsweetened Cocoa Powder


Required Equipment:


How-To:


  1. In food processor place the biscuits and pulse them until they become as fine as dist. Then add the butter and the honey and pulse to a relatively homogeneous mixture.
  2. Butter the bottom of the cake and spread evenly the buttery biscuit base.
  3. Cover with clean film and but in the freezer while you are preparing the rest of the cake.
  4. If you are adding strawberries now is the time to cut in halves enough strawberries so that you'll have enough to cover the base of the cake.
  5. Chop the chocolate to small pieces and place in medium bowl.
  6. In a sauce pan bring the cream to boil. When you see the first bubbles turn off the heat because it will start to burn shortly.
  7. Pour the piping hot cream over the chocolate and start stirring slowly. CAREFUL, it really hot and you don't want any of this on your skin.
  8. Stir until all of the chocolate chunks are melted and the mixture is nice and shiny. 
  9. Add a pinch of salt, this will make the taste of the chocolate even stronger - I don't know why, but it always does!
  10. If you wish - add few table spoons of cocoa powder to make the chocolate taste more bitter and natural.
  11. Take the tin out of the freezer, pour 1-2 table spoons of the chocolate ganache, so that the whole bottom is spread with thin layer and place the strawberries on top of it.
  12. Now pour the rest of the ganache, leveling the top with the bottom of a spoon.
  13. Dist some cocoa powder just for more dramatic effect.
  14. Put in the freezer for at least 3-4 hour or in the  fridge for at least 12 hours.
  15. To take out of the baking tin put a tea towel in a microwave for 30 seconds and then place around the the side of the cake. Then open the spring and take out the cake!
  16. And this is it! Enjoy chilled, but not straight from the freezer because it will be impossible to cut in pieces!
The Cake of All Cakes


You can't get lost if you don't know where you're going...

19 April 2014

19-Apr-2014

Hot Cross Buns

The most English Easter thing of them all are the Hot Cross Buns. They are nice and sweet, but not too much. Their taste resembles a bit of the Eastern-European 'kozunak' that is served for Easter, but they are more moderate in taste. Again, I wanted to challenge my cooking skills more than to do the Christian tradition, but it was fun.

Ingredients:

For the Buns:


  • 625gr All-Purpose Flour
  • 1tsp Salt
  • 1tsp Cinnamon
  • 1/2tsp All Spice
  • 1/2tsp Ground Nutmeg
  • 45gr Butter (made into cubes)
  • 85gr Icing Sugar
  • 1 Lemon's Zest
  • 1 1/2tsp Yeast
  • 1/2 Baking Powder
  • 1 Egg
  • 275ml Milk (room temperature)
  • 1 cup Dried Fruit (I used raisins and dried cranberries)

For the Hot Cross:


  • 1tsp Flour
  • 1tsp Icing Sugar
  • 1tsp Water
  • 1tsp Golden Syrup

For the Glaze:


  • 1tbsp Honey


How-To:


  1. Sift the flour with the salt and the spices. Add the butter and mix them together. It's best to do so by hand, mixers won't just do the job. It should resemble small breadcrumbs.
  2. Add the lemon zest and the sugar, and mix together again.
  3. Mix the egg and the milk together and pour it in the flour mixture. Knead it together until nice and even. Knead in the dried fruit.
  4. Let to rise for 1 hour and a half, covered with clean kitchen towel.
  5. When the rising is done make the dough into small balls and place on a baking paper.
  6. Put in warm (around 50C) oven for another good 15-20 minutes.
  7. Mix all of the ingredients for the Hot Cross together, place it in a clean piping bag with a small nozzle.
  8. After the second rising make a small cross on top of each bun.
  9. Bake for 13 minutes and then take out of the oven and smear with some unsalted butter.
  10. Put again in the oven for another 3-4 minutes.
  11. Take out of the oven and spread some honey on top of them. Let them cold down for a bit and enjoy with some warm milk or your favourite tea.


Easter Yummy!


You can't get lost if you don't know where you're going...

18 April 2014

18-Apr-2014

Natural Egg Dye

I am not religions whatsoever and had no inclination to celebrate Easter as the big Christian celebration that is. So I  wasn't planning to dye eggs this year until I my Mum suggested that I use natural materials to dye them. More about the challenge that the traditional purposes of dyeing eggs, I spend 2 hours yesterday playing with the eggs. The results weren't thrilling, but they were satisfactory and I also had so much fun! I decided to boil just 9 eggs, so we will be able to eat them all in one go. And none of them broke, so that was just great!

Ingredients:


  • The Skins of 4-5 Red Onions
  • 3 tsp Turmeric
  • 2 tsp Paprika
  • Vinegar
  • Hot Water

How-To:

For Red Eggs:


  1. Put the onion skins in a pot, cover with water and bring to boil.
  2. Boil for 30-45 minutes and then throw away the skins and keep just the water. The water should be dark red in colour.
  3. Add 2 tbsp vinegar and a 2 tsp paprika and stir well.
  4. Place the eggs in the mixture and let them stay for good 5-10 minutes. The colour should be dark red almost purple.


For Yellow Eggs:


  1.  In a cup put 3 tsp turmeric and 2 tsp paprika, 1 tbsp vinegar and 150 ml hot water.
  2. Stir together and place the eggs in it.
  3. Leave them inside for 10-15 minutes. The colour should be yellow, maybe a bit lighter that expected.

So Proud Of My Easter Eggs

Easter Paradise


You can't get lost if you don't know where you're going...

17 April 2014

17-Apr-2014

Minced Meat Wellington

With Easter just around the corner, I'm getting in my Cooking-Champion Mood. Lots of baking is about to happen, plus egg dyeing, a birthday cake has to be prepared and a whole chicken - roasted. Today for dinner I decided to prepare an English classic - Wellington loaf. It looks great and it tastes even better! And is so easy to prepare! I decided to make it with minced meat (because this is what I had in the fridge) but it can be prepared with beef, veal, chicken, anything! Also, I used a store-brought puff pastry because is so much easier and it minimizes the time spend in the kitchen. Lovely jubly!

Ingredients:


  • 500gr Minced Meat
  • 500gr Puff Pastry
  • 1 Potato (big)
  • 2 Carrots
  • 1 cup Peas
  • 1 Onion
  • 5-6 Mushrooms (medium size)
  • 1 Egg (big one)
  • 2 Garlic Cloves
  • Olive Oil
  • Rosemary, Cumin
  • Salt and Pepper

How-To:

  1. Cut all the vegetables (except the peas) and the rosemary to small pieces and place in a pan with 2 tsp olive oil. Put on the stove and let cook until all of the veggies get slightly softer. That will take around 10-12 minutes. When they start to get soft, turn off the stove and let the mixture cool down completely.
  2. In a big bowl mix together the minced meat, the slightly cooked veggies, half of the egg (beaten) and the spices and mix together. Make sure that the mixture is even.
  3. On a clean surface sprinkle some flour and roll the pastry to a big rectangle. Place the mince on the long side of the dough and form a long, nice roll. 
  4. Cover the edges with some of the beaten egg so they would stick together. Press down all of the open sides of the loaf so that they will be now closed.
  5. Place the Wellington in a floured baking tray and cover the pastry with the rest of the beaten egg.
  6. Bake in preheated over at 180C for 1 hour, until its nice and golden.
  7. Serve with mashed potatoes, steamed peas and broccoli or salad.
And this is it! Enjoy it with a glass of red wine or nice cold beer.

Nice & Golden!


Yummy! English Classics!


You can't get lost if you don't know where you're going...

16 April 2014

16-Apr-2014

The Book That All Adults Should Read


Plot:

Scout Finch is a six-year-old girl that lives in the fictional town of Maycomb, Alabama with her older brother, Jem, and their widowed father, the lawyer Atticus. The story takes time during the Great Depression, a time of great prejudices and short-mindedness. Atticus takes the case of defending a black person accused of committing a crime (but he's innocent). The town rebels against Atticus' tries to prove his client's innocence and makes their life incredibly difficult, especially taking in account that he is a single father. The end is special, showing the best and the worse in people. The Finch children make a new friends and learn a great lesson - don't kill mockingbirds, all they do is sing.

Why All Adults Should Read:

First, this is a children's book, believe it or not. Second of all, is a golden classic. It's about justice, prejudices and learning what is right and what is wrong. It's beautifully written and the story keeps you interested in all times, it evolves and challenges reader's perspective. All adults, that claim themselves to be very open-minded and not to have any prejudices at all, have to test themselves and see whose side they'll take while reading it. And Scout is such a lovable, charming and sweet character that the reader can't help it but dream of meeting her in real-life or imagining that they would've been the same if they were in her position. It's truly beautiful!


You can't get lost if you don't know where you're going...

15 April 2014

15-Apr-2014

Homemade Almond Butter

A few months back I discovered the Peanut butter. At first I found its taste a bit weird and unappealing but halfway through the first jar I felt inlove with it. Now it is irreplaceable part of my cooking and my snacks. So today I decided to try and make my own nut butter. I still have some peanut butter in the jar and almond butter is impossible to find in most of the stores (I have to go across town if I want to find almond butter) so i decided to give a try and prepare my own homemade almond butter. It turned out to be so easy that I think I'll never go back to jarred nut butters.

Ingredients:


  • Almonds (or other nuts of your choosing - peanuts, cashew, hazelnut, pecan, walnut, pistachio and macadamia would work just fine)

How-To:


  1. Place the nuts in food processor/blender and blend them together for few minutes until they turn into dust.
  2. Then stop and scrape the mixture from the sides.
  3. Proceed to blending them until they turn into nice, thick and smooth almond butter. And this is it!

NOTE: A handful of almonds makes 2 tbsp of butter. So for a whole jar you'll probably need up to 500 grams of almonds.

TIP: I highly recommend the following snack: a toasted slice of wheat bread cover with almond butter and a few slices of apple placed on top of it. Sprinkle with cinnamon for extra special taste.


Mmm, simply delicious!


You can't get lost if you don't know where you're going...

14 April 2014

14-Apr-2014

Happy Birthday Mummy,

My Dearest Safe Haven!

My dearest Mum is my safe place. She's my anchor and my haven. She is the one person that will always back up my crazy ideas and my wide dreams. She will navigate me as through difficulties and will help me overcome the bumpy road of life. She is the one to blame for my artsy inclinations and my mad imagination. My Mamma, she's a fighter. And a loving soul. And she loves to try new things.
My Mum is always working and she's always busy doing something.But she always finds time for the people she loves. She knows how to make out family work, knows how far she can go with each and every one of us before we break. She always requires a lot of us, but only because she knows how much more we can do if we only had the patience to do it. And, oh, she loves to experiment in the kitchen. It's thanks to her that I'm not afraid to try all kinds of bizarre new foods and later on implement them in my kitchen. 
SO, Happy Birthday, Mummy! May your year be full of adventures and new experiences! We will be around you, just as you want us to be!

The Loveliest of Them All


You can't get lost if you don't know where you're going...


13 April 2014

13-Apr-2014


The Great Outdoor

After spending a week locked to my laptop and working, working, working all the time, this weekend was time for a change. The weather was great and all, so I had no excise for staying indoors.
Yesterday we went for a walk. A 10 kilometers one, from Falmer, where we live, to Lewes, the nearby town known for its picturesque beauty and fairly cheap pub food. One of our ex-room-mate came over from London, where she works now, and brought 3 of her friends with her. With bags full of apples, chocolate and water bottles we entered a fun journey through the hills. It was beyond great. We walked for almost 3 hours, enjoying the nice weather and all the great thing we ran into. Including newborn sheep, few beautiful horses, a windmill in the middle of nowhere, few very fancy houses and  loads of pretty flowers. Our walk ended at the Lewes' Arms pub where eat some delicious food and drank ale, as you do after walking 10k.

Today, Mr. Boyfriend and I decided that the weather is equally great so it will be a pity to stay at home the whole day and just do nothing. Or even worse, to stay in front of out computers. So, we mounted our bikes and off-we-go! We did a 25km ride with just one stop - Mr.Boyfriend got really hungry and because he refused to let me make sandwiches before we left home, we had to stop and look for food for him. It was a great adventure, this was my first real bike ride and I'm so proud of myself. Not a single hill stopped me going and I was able to keep up with Mr.Boyfriend. It felt a-ma-zing, I haven't felt so good in my own skin for a very very long time. I felt healthy and energized and powerful and in charge of my own life. One of the best feeling ever!

Ah, Spring, you know me so well...


You can't get lost if you don't know where you're going...

12 April 2014

12-Apr-2014

Chocolate Cherry Brownie Cake 

So, yesterday I baked yet another cake. I know, I know, all I can think about are cakes and cookies. However, this time I have an excuse. This cake, this lovely, soft, rich cake, I baked as a dessert for last night's dinner. Mr. Boyfriend and I went over at one of my closest friends from uni and her boyfriend. It was great, I had so much fun and it was one of my best nights in a long time. We ate, we drank, we talked and it was truly amazing. And because you should never go empty-handed anywhere, I baked this cake. It's so nice and smooth, a bit crispy at the top but soft, chewy and gooey on the inside. It was total success, especially in combination with cream or ice-cream. Mmm, bring the forks!

Ingredients: 


  • 100gr Butter
  • 175gr Caster Sugar
  • 75gr Brown Sugar
  • 100gr Plain Flour
  • 1/2 tsp Baking Powder
  • 125gr Chocolate for Cooking
  • 1tbsp Golden Syrup (or Honey, or Maple Syrup)
  • 2 Eggs
  • 1 tsp Cherry Liqueur (you can use vanilla extract if you prefer it)
  • 4 tbsp Cocoa Powder
  • 150gr Morello Cherries 

How To: 


  1. Place the butter, the sugar (both types), the chocolate and the golden syrup in a pan and melt gently until smooth. Then remove from the heat and set aside.
  2. In a medium bowl break the eggs and whisk them lightly. Add the melted mixture and the rest of the ingredients. Mix thoroughly.
  3. Pour in greased and lined with paper baking pan. Bake for 45 minutes at 180C or until cooked.

Brownie Cake Is The Best


You can't get lost if you don't know where you're going...

11 April 2014

11-Apr-2014

Lemon Drizzle Cake


This is one of my all-time favourite cakes. It's so easy and simple and it tastes so good! It's divine! You wouldn't expect lemon and cherries to complement each other so well but they do. I baked this this morning for the last seminar I have with my favourite tutor. In the beginning of the term I promised to bake him a cake if we have fun during the term so today  was the day. And he love it! SO, here is the recipe for spring in a plate!

P.S. You can always switch the cherries with blueberries or raspberries. It tastes equally good, but in a different way.

Ingredients:

The Cake


  • 225gr Butter (softened)
  • 225gr Caster Sugar
  • 225gr Plain Flour
  • 1tsp Baking Powder
  • 1 Lemon's Zest
  • 4 Eggs
  • 150gr Morello Cherries (frozen or fresh)

The Drizzle:


  • 1 1/2 Lemon's Juice
  • 85gr Sugar

How-To:


  1. In a bowl mix the sugar and the butter together. Using a mixer combine them to a light, creamy and fluffy mixture.
  2. One by one add the eggs, stirring them slowly.
  3. Sift in the flour and baking powder, the lemon zest and the cherries. Mix well.
  4. Pour in greased and lined loaf tin. Level it at the top.
  5. Bake for 45 minutes  (+/- 10) or until is done.

    Tip
    : To check if any cake is ready stick a tooth pick in it. If it gets out clean, without any batter on it then is ready. If not-return to the oven.

For the drizzle:


  1. Mix the sugar and the lemon juice together.
  2. When the cake is baked wait for 5-10 minutes and pour the syrup on top of it.
  3. To make sure that the syrup goes into the cake you can make a few small tooth pick holes prior to pouring the syrup.

This Is How Spring Tastes

UPDATE: I prepared this cake again for Easter, this time adding poppy seed instead of morello cherries. I also doubled the amount of lemon zest in the cake just to make it more lemony. Everyone loved the result, this recipe is a keeper!


Lemon and Poppy Seed Deliciousness!


You can't get lost if you don't know where you're going...